---------------------------------------------------------------
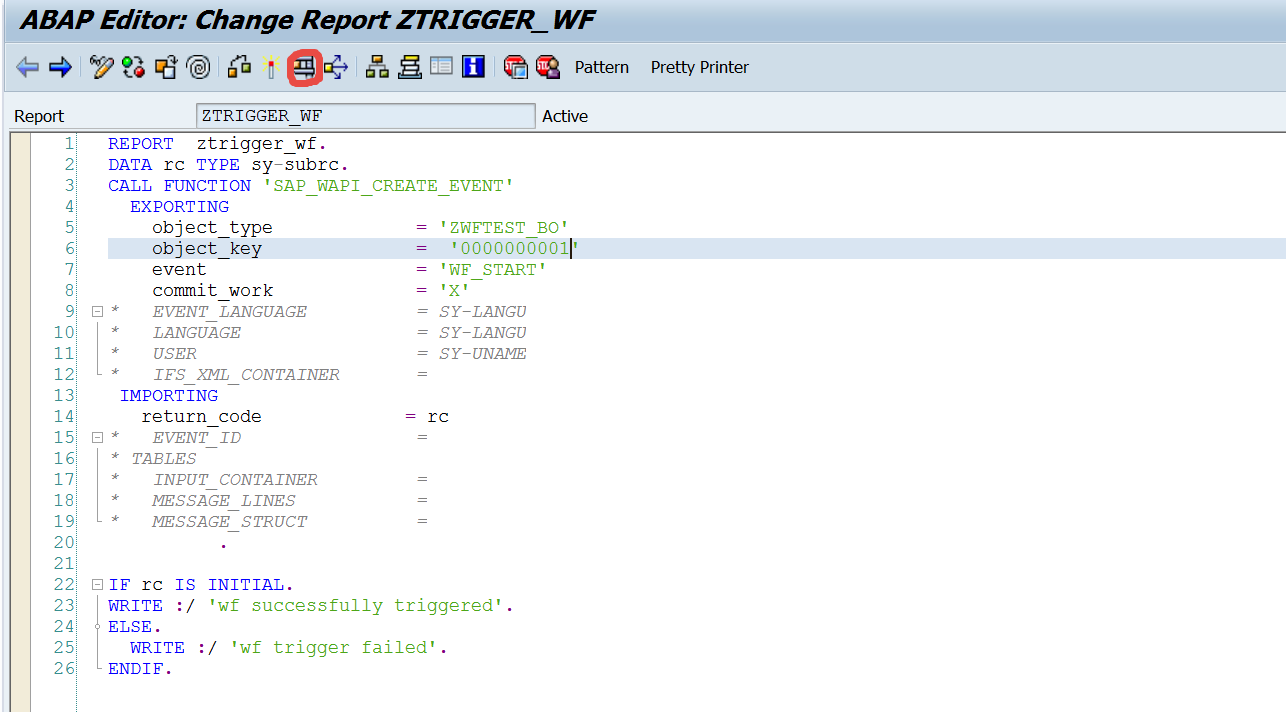
See link Triggering wok flow with business object event
A simple workflow with send mail step.
Step1. Go to Tx- SWDD

Step2. Click on Create button.

Step3. Go to the header by selecting the highlighted button.

Step4. Provide the work flow name and description. Save and back.

Step5. We want to send an email. So double click on the step.

Step6. From the step selection choose Send Mail step.

Step7. Provide the mail subject and the mail body and then Click on Continue button.

Step8. As send mail is a step in the workflow, provide the step name and description and save in the related package.

Step9. Activate the workflow.

Step10. Now we have to test the workflow to see if it is sending an email or not.

Step11. Usually the email would be sent to the user Tx- SBWP.
Go to the Tx- SBWP and see in the inbox.

Step12. Now execute the test of the workflow.

Step13. Once executed it shows the below message. To see the log click on the Workflow Log button.

Step14. Here is the workflow log. Click on the Graphic button to see graphical view.

Step15. The green line indicates that, the wf stared and the EMAIL STEP - STATUS UPDATE has been executed and wf has been completed.

Step16. Go the user Tx- SBWP and in the inbox we can see there is one document. Double click on that to see its body.

Step17. Here is the mail content that is mentioned in the work flow mail step body.

See link Triggering wok flow with business object event
A simple workflow with send mail step.
Step1. Go to Tx- SWDD
Step2. Click on Create button.
Step3. Go to the header by selecting the highlighted button.
Step4. Provide the work flow name and description. Save and back.
Step5. We want to send an email. So double click on the step.
Step6. From the step selection choose Send Mail step.
Step7. Provide the mail subject and the mail body and then Click on Continue button.
Step8. As send mail is a step in the workflow, provide the step name and description and save in the related package.
Step9. Activate the workflow.
Step10. Now we have to test the workflow to see if it is sending an email or not.
Step11. Usually the email would be sent to the user Tx- SBWP.
Go to the Tx- SBWP and see in the inbox.
Step12. Now execute the test of the workflow.
Step13. Once executed it shows the below message. To see the log click on the Workflow Log button.
Step14. Here is the workflow log. Click on the Graphic button to see graphical view.
Step15. The green line indicates that, the wf stared and the EMAIL STEP - STATUS UPDATE has been executed and wf has been completed.
Step16. Go the user Tx- SBWP and in the inbox we can see there is one document. Double click on that to see its body.
Step17. Here is the mail content that is mentioned in the work flow mail step body.